Mouseless Rust
How to set up a mouseless development environment for Rust

Lately I’ve taken an interest in the Rust programming language. I read the epub version of the Rust book over summer and found it quite well-written and overall interesting. Recently, I got myself a hard copy that sits on my desktop for quick queries, as I’ve been re-implementing the Gaia Sky catalog generation in Rust. The reasons for this are varied, but basically they come down to hardware. We need to load a humongous amount of stars (~1.6 billion) into memory, our old server, which had 2 TB of RAM, is being replaced by a newer, faster, and smaller (memory-wise, ~700 GB) machine in which we won’t be able to generate with the current Java implementation. But this is a story for another post. Today I’m here to document the completely mouseless Rust development environment I’ve been putting together as a sort of side project, to aid in my re-implementation.
The development enviornment is founded on two pieces of software:
- The
vimeditor. I’m actually usingneovim. - A tiling window manager (TWM). I’m using
i3, but any of the other TWM around (qtile,xmonad,awesome, etc.) will do.
My setup consists of a workspace dedicated to Rust. This workspace is divided vertically (this means one window on top, one at the bottom). The top window contains an instance of neovim. I use it to edit the rust files. It provides tabs, buffers, indexing, syntax highlighting, completion and whatnot. The bottom window (or windows) are regular terminal windows used to compile and launch the program. Switching from one to the other is a couple of keystrokes away in any TWM. Int my case, I use <super-j> to move down, and <super-k> to move up.
Neovim
This is arguably the most important component of the setup. If configured correctly, with the proper plugins and key bindings, vim stands its ground against a fully-fledged IDE like IntelliJ IDEA.
We need a few plugins to achieve a pleasant experience, but first, a word about plugin managers. I recommend using vim-plug to install and manage your plugins. The configuration is dead-simple, as only a plugin list is required in the init.vim or .vimrc file. Plugin installation and update is done via the command :PlugUpdate. Once run, all defined plugins will be automatically downloaded and installed for you. If you remove a plugin from you list, run :PlugClean so that vim-plug removes it from your system. Now, let’s see the plugins.
Conquer of Completion
Conquer of Completion, or coc.vim provides the framework for instant increment completion. Very useful for auto-completing variables, methods and so on. But we need CoC to understand Rust, and for that we need to install rust-analyzer and then the CoC extension, coc-rust-analyzer.

Rust completion in neovim.
rust-analyzer is an implementation of Language Server Protocol for Rust, which provides completion, goto definition and modular compilation. You can install it directly from your package manager (along with rustup),
pacman -S rust-analyzer rustup
and then install the source code with rustup:
rustup component add rls rust-src rust-analysis
Once that’s done, enter vim and do :CocInstall coc-rust-analyzer.
rust.vim
rust.vim is a plugin that provides formatting, file detection and syntax highlighting. Add it to Plug and then add let g:rustfmt_autosave = 1 to your vim configuration so that all Rust files are formatted on save.
fzf.vim
This one is not Rust-only, but nice to have. fzf.vim provides blazing-fast fuzzy file search. It replaces the good old CtrlP.
Extra stuff
Additionally, you can set up a file system watch on the current folder and run the cargo build automatically whenever something changes. I sometimes use entr for this purpose. rust-analyzer already compiles and checks the code on save, so the utility of this is up for debate. But still, I find looking at the proper rustc output in a different pane useful.
ls src/*.rs | entr cargo build
The great thing about this kind of configuration is that it is very easy to tailor to one’s needs. You can easily manipulate every single behaviour and feature just by editing config files. To end on a high note, below is a capture of what the Rust dev workspace looks like.
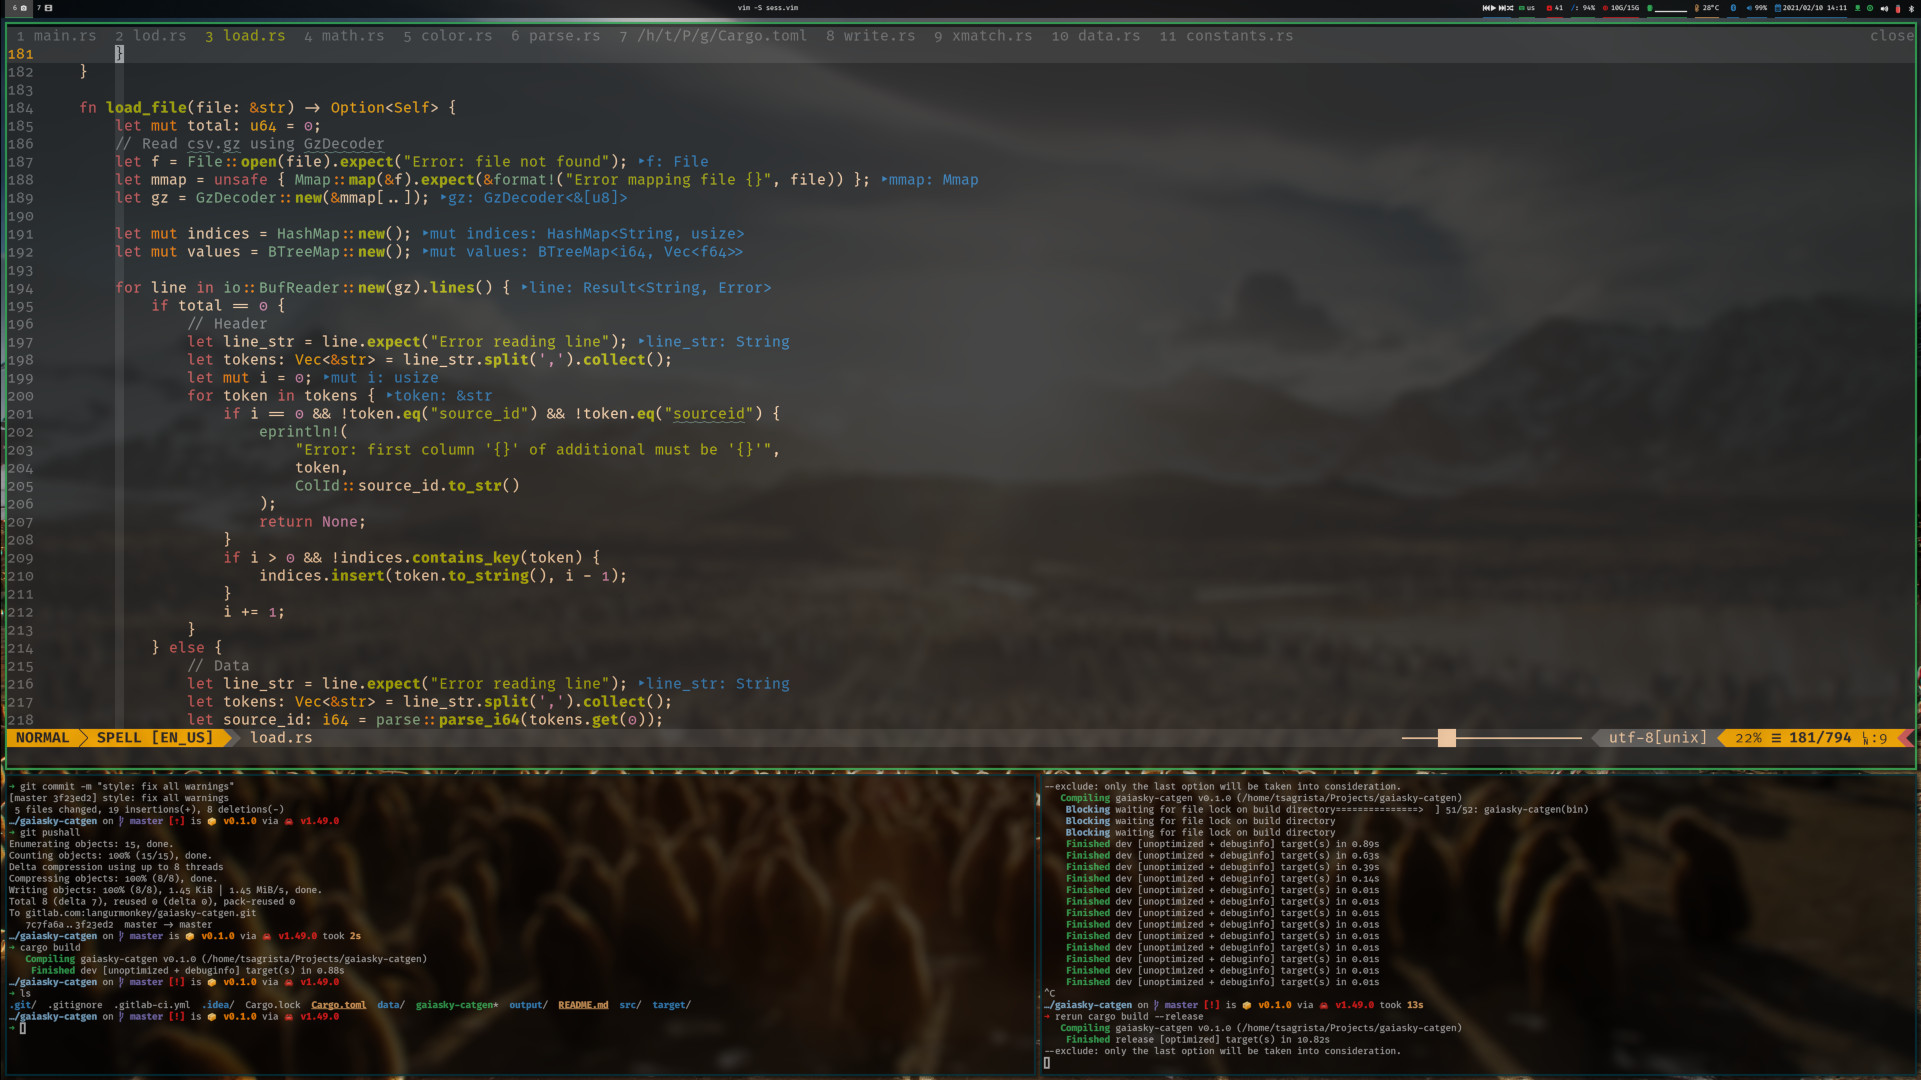
The mouseless development environment.
The dotfiles for this configuration are all stored in this repository. Here are my vim dotfiles, and here are my i3 dotfiles.